How to prepare a print ready multi-page document in InDesign
Read the article below to download the printable PDF version
Introduction
Zones
Setting up InDesign for 8pp+ SADDLE STITCH AND PERFECT BIND (PUR) TEXT SECTION

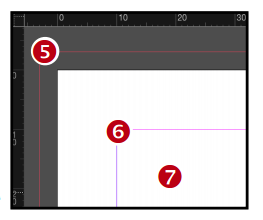
A blank document will open and you will see the following lines:
5. The Red Line indicates the reach of your Bleed Area
6. The purple line shows the Safe Text Zone (Margins)
7. The white box with black outline indicates the trimmed page size
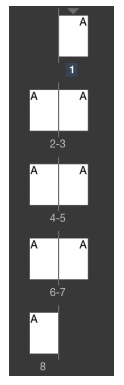
As facing pages were selected you can see in the ‘Pages Tab” that:
- Your first page is a single page (Front Cover or first page of Text)
- The following pages are double page spreads
- The last page is a single page (Back Cover or last page of Text).
This will help you identify the left and right hand pages to make the magazine layout easier.
Perfect Bound (PUR) 4pp COVER + SPINE
The Cover artwork needs to be done separately from the text pages. The cover artwork will include the Front (FC), Back (BC), Inside Front (IFC), Inside Back (IBC) and Spine.
The InDesign document should have 2 pages in and include the extra width of the spine. e.g. an A4 book with a 6mm spine will be 210+6+210 =426mm x 210.
You also need to take into account the ‘Hinge’ on the cover and not run any artwork into this area. The hinge is where the cover folds. It takes up 6mm of the artwork on the Inside of the front cover and the first and last text pages. It is not recommended to run images across spreads in Perfect Bound (PUR) books for this reason.
Do not run any image from the Inside Front/Back Cover into the Inner Spine. This is because the glue wont stick very well on inked parts of the paper. However you can bleed any images into the 6mm hinge area.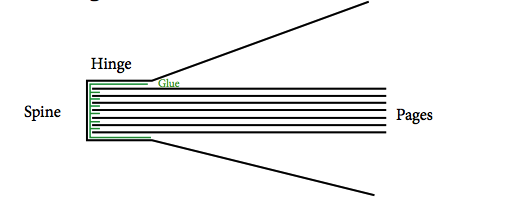
Swatches
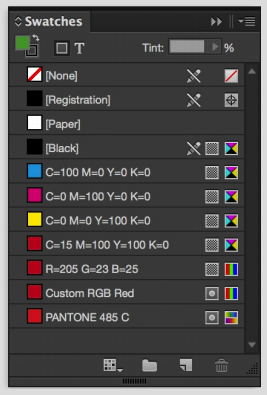 Colour Swatches Please ensure that all colour swatches are CMYK unless you are printing a specific Pantone Colour or using a custom spot colour to highlight personalised areas of text for lasering/inkjetting. You can tell what type of colour swatch you have by the icons after the colour name.

CMYK (Cyan, Magenta Yellow, and Black) also know as 4 Colour Process
RGB (Red, Green and Blue). Used for computer VDUs. Requires converting to CMYK.
Book Colour (Such as Pantone). Industry Standard specialist ink colours.
Process. The colour has been mixed using the primary colours of either CMYK or RGB.
Spot Colour. This indicates that the colour is in its own unique colour channel and not part of the process colour channels.
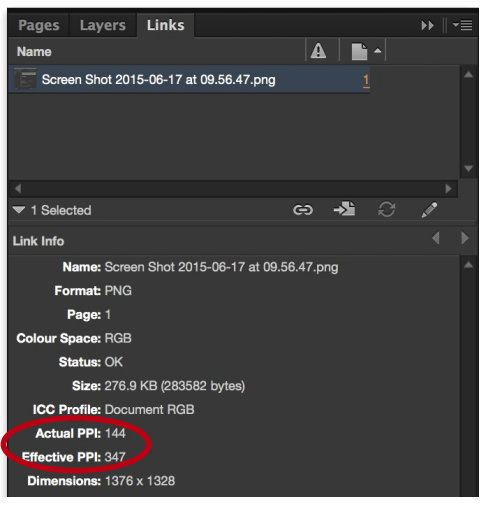
Checking Image Resolution
When you scale an image in InDesign you are affecting its final resolution. If you put in a large 72ppi image and scale its dimensions down, its effective resolution will increase. Likewise if you increase a small image you reduces its effective resolution. You can view an images effective resolution by going to WINDOW>LINKS. Click on the image and in the LINK INFO box is the images information. This shows the ACTUAL PPI and the EFFECTIVE PPI. The recommended EFFECTIVE PPI needs to be 300 PPI or above but as a absolute minimum we recommend no less than 150PPI.